How to setup the integration between Xledger and BDO’s data warehouse. You only need to complete these steps once.
Step 1: Create an Integration User
(Skip this step if you already have an integration user.)
To create an API token in Xledger, you must first have a dedicated integration user. Follow the steps below to create this user:
- User Permissions
- a. The integration user must have the Administrator role in Xledger.
- Email Address
- a. The integration user should be created using a shared email address (for example, integration@companyname.com).
- b. This email should be accessible to multiple people within the organization – for example, through a shared inbox, a password vault, or another secure solution for shared login credentials.
- c. Do not use a personal email address. If the user is linked to a personal account, the API token will become invalid if that person leaves the organization or their account is deactivated in Xledger.
Both direct Xledger customers and customers under a partner can create the integration user themselves.
Step 2: Log in to Xledger
- Open your web browser and go to the Xledger login page. Xledger login
- Use the integration user created for this purpose. If a password and phone number were set during user creation, use these credentials to log in.

NB: The token must be created either at the company level or the group level (Konsern) in Xledger.
a. If BDO is the auditor for all companies within a group, the token must be created at the group entity level in Xledger.
b. If BDO is the auditor for some companies within a group—but not all—the token must be created for each individual company that BDO needs access to. This means that one token must be created for each company, and not on group (konsern) level.
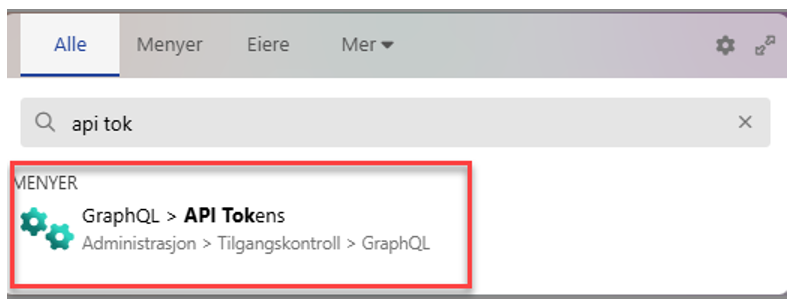
Step 3: Navigate to the API Section
- After logging in, you will land on the main menus, go to API Token.
- You can access the API token either through the search menu, which you can bring up by double-tapping Shift or by clicking on Change in the user menu at the top right corner.

a) Both will result in displaying the following:
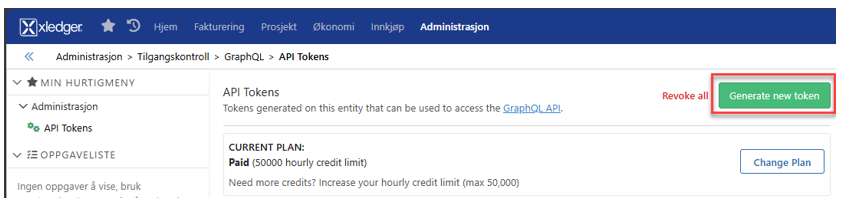
Step 4: Create a New API Token
- In the API Tokens menu, click on "Generate new token".
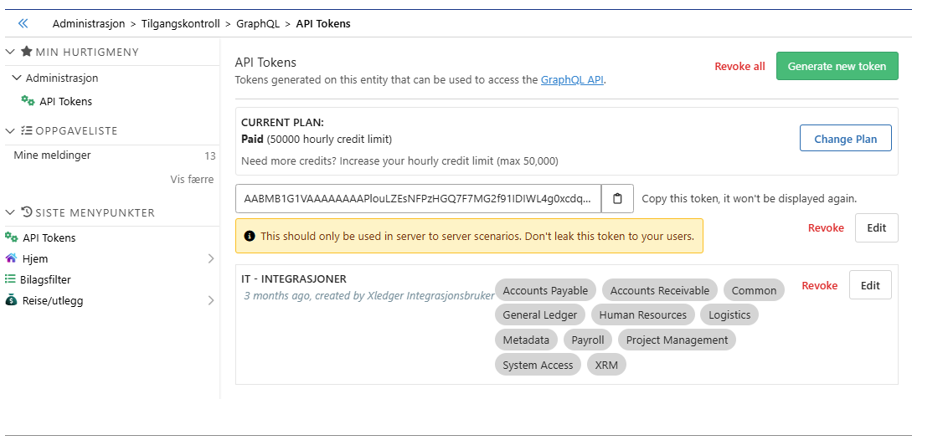
- Assign the following read permissions in Scope as shown in the image below.

3. Add a description in the "token description" field to reflect its purpose or endpoint for easier token management.
Step 5: Copy the Token
- Click on "Generate token" as shown in the image above.
Copy the generated token.
Note: This token will not be displayed again, so it is important to save it now.
Step 6: Transfer the Token
- Save the copied token in a document along with the Org. number. Upload the file in the field below, fill in the email, and click "Send".